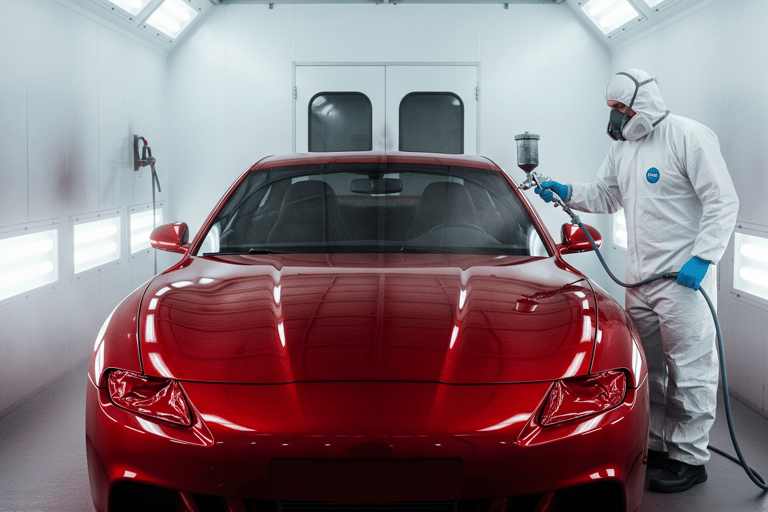
How Much Does a Car Paint Job Cost? A DIY vs. Professional Breakdown
This friendly guide will explore the costs of professional versus DIY car paint jobs, helping you decide the best way to give your beloved ride a fresh new look!
BLOG/LEARNING CENTER
Renan Noval
8/3/2025
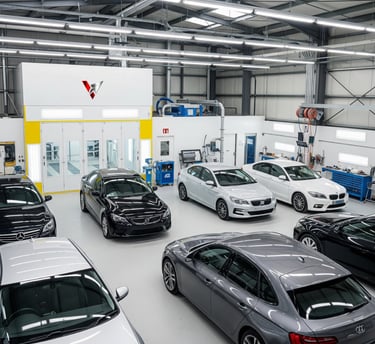
So, what’s the bottom line? How much does a professional car paint job actually cost?
Okay, let's get right to it! The price tag for a professional car paint job can swing wildly. Think of it like ordering a pizza.
You can get a basic cheese pizza for cheap, or you can go all out with extra toppings, a fancy crust, and dipping sauces, which costs more.
For your car, a basic paint job might cost you between $300 and $2,000 AUD. A good, standard quality job will likely be in the $2,500 to $7,500 AUD range. And if you want a top-tier, showroom-quality finish that makes heads turn?
You could be looking at $8,000 to $20,000+ AUD. The huge price difference comes down to three main things: how much prep work is needed (like fixing dents, scratches, damage plastic parts and rust), the quality of the paint itself, and the level of skill the painter has.
The kind of paint your car has on it ( like White Pearl, Solid Red, Silver Metallic, etc).
What do I get with a cheap, basic paint job?
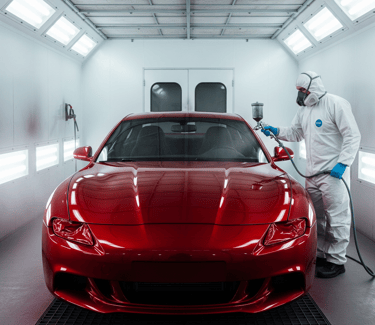
A basic paint job, often called a "scuff and shoot," is the fastest and most budget-friendly option. This is your entry-level choice, usually costing somewhere between $150 and $2,000 AUD.
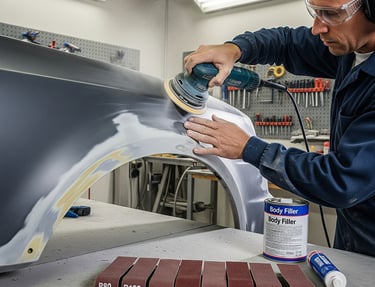
For this price, the auto body shop will do very little prep work. They might do a light sanding on your car's existing paint but won't spend much time fixing dings, dents, or rust spots.
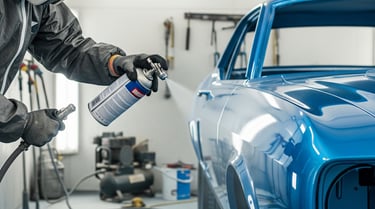
They will then spray on a few coats of a simple, single-stage urethane paint or a spray can. This paint is less durable than more expensive options but gets the job done.
This kind of paint job is a good fit for an older work vehicle, a first car you just want to look a bit better, or if you're planning to sell the car and just need a quick cosmetic refresh.
Don't expect a perfect, mirror like finish, but it will look much better from a distance.
This sounds interesting. What about a standard paint job? What's included?
Now we're leveling up! A standard paint job is the most popular choice for most car owners who want a great, long-lasting finish without breaking the bank.
The price for this service usually falls between $2000 and $7,500 AUD.
What do you get for the extra cash? A whole lot more care and quality. The technicians will spend a lot more time on your car’s paint preparation.
This means sanding the car down to the bare metal if needed, properly fixing small dents and scratches, and treating any rust patches so they don't come back.
They will use higher-quality paints, like urethane, which is tougher , glossy and lasts longer.
This process usually involves multiple steps: a layer of primer, several coats of the base color, and then a few coats of clear coat on top to give it that amazing shine and protection.
This is the perfect choice if you love your car and plan on keeping it for a while.


I want my car to look like a superstar. What is a showroom-quality paint job?
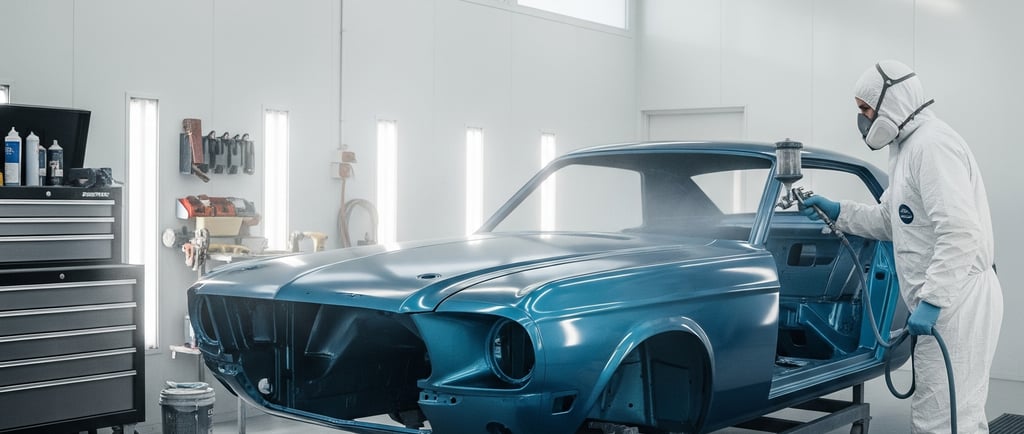
A showroom-quality or concourse-level paint job is for the true car enthusiast who wants absolute perfection.
This is the kind of work you see on classic cars at shows or on high-end luxury vehicles. The cost starts around $8,000 AUD and can easily go past $20,000. Why so much? Because it's art.
The car is often completely taken apart. We're talking doors, bonnet, boot, bumpers, and trim all removed. Every single panel is sanded down to the bare metal and made perfectly smooth.
The painter will fix every tiny imperfection, even ones you can't see. They use the most expensive, top-of-the-line paints and apply many, many coats.
After painting, they'll spend dozens of hours sanding and polishing the finish until it looks like a flawless sheet of glass.
This process can take weeks or even months, but the result is an absolutely stunning, jaw-dropping finish that's better than when the car was brand new.
Okay, I'm feeling brave. How much does a DIY car paint job cost?
So you want to be a weekend warrior and paint your car yourself?
Going the Do-It-Yourself (DIY) route can definitely save you money on labor, but don't think it's free.
You still have to pay for all the materials and tools. For a decent DIY job, you should budget between $50 and $500 AUD for supplies.
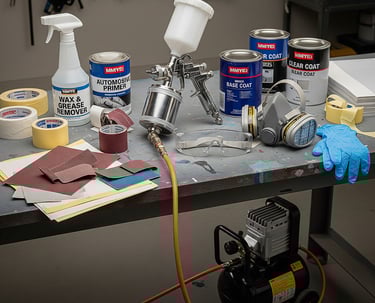
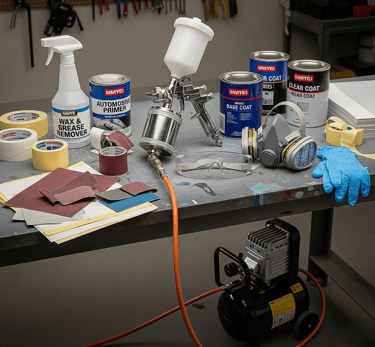
What will you be buying? First, the prep stuff: sandpaper of different grits ($30), masking tape and paper ($25), and wax and grease remover ($20).
Then, the main event: primer ($100+), your colored base coat paint ($200+), and a clear coat for protection and shine ($150+).
The biggest cost might be the tools. If you don't have one, you'll need an air compressor, air line hose. and a good quality paint sprayer (spray gun), which can cost anywhere from $100 to $500 or more.
Plus, don't forget safety gear like a proper respirator mask, safety glasses, and gloves ($70+).
The costs can add up quickly, but it's still cheaper than paying a pro.
Here are the complete list that youll be needed with your DIY painting project.
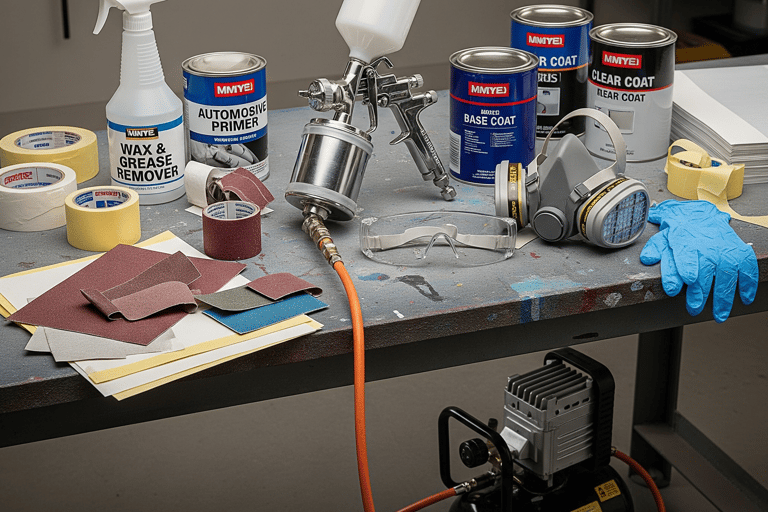
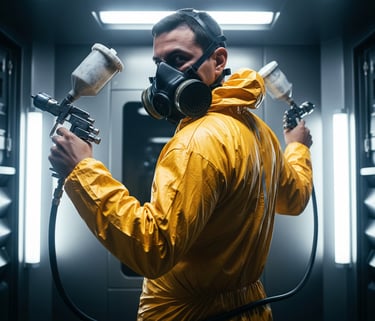
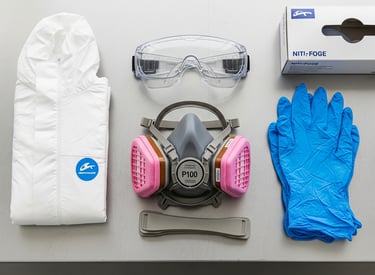
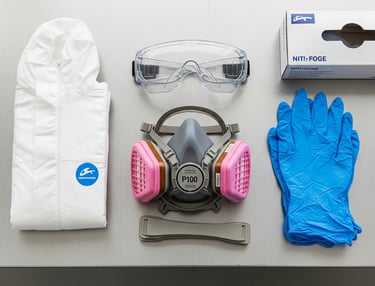
Category 1: Safety Equipment (Absolutely Essential!)
This section is paramount. Automotive paints, especially 2K (two-part) clear coats, contain isocyanates, which are extremely harmful to your respiratory system.
Do not even consider starting without these items.
Respirator: You need a half-face or full-face respirator equipped with NIOSH-approved organic vapor (OV) cartridges and P100 particulate pre-filters. A simple dust mask offers no protection. This is the single most critical piece of equipment you will purchase.
Full-Body Spray Suit: A disposable Tyvek or similar suit with a hood will protect your skin and hair from toxic overspray.
Safety Goggles/Glasses: If you choose a half-face respirator, sealed goggles are necessary to shield your eyes from splashes and overspray.
Nitrile Gloves: Solvents in paint and thinners will quickly degrade latex gloves. Invest in a box of durable nitrile gloves.
Adequate Ventilation: This can be challenging for a DIY setup. At a minimum, your garage must be exceptionally well-ventilated, with large fans positioned to create a cross-flow, expelling air out of the space. Never spray in an enclosed area with no airflow. Be aware of fire hazards associated with fan motors and overspray vapor.
Category 2: Preparation & Disassembly
Preparation accounts for 90% of a successful paint job. Neglecting this step will result in paint failure.
Basic Hand Tools: A socket set, screwdrivers, and a plastic trim removal tool kit are needed to detach bumpers, lights, handles, and trim without causing scratches.
Air-powered: The industry standard, but it requires a substantial compressor.
Electric: More accessible for DIY enthusiasts. A quality random orbital sander from a hardware store will suffice. Opt for a 6-inch model.
Sanding Blocks: A collection of hard and flexible blocks is vital for sanding flat and curved surfaces smoothly, preventing ripples.
Sandpaper/Abrasive Discs (for the DA sander):
P80−P120 grit: For stripping old paint and initial shaping of body filler.
P180−P240 grit: For final shaping of body filler.
P320−P400 grit: For feathering edges and the final sanding of primer before applying the base coat.
P600−P800 grit: (Optional) For final sanding of sealer or achieving an exceptionally smooth primer finish.
Body Filler & Glazing Putty: Use Bondo or a similar professional-grade filler for dents, and a glazing putty for filling minor scratches and pinholes.
Filler Spreaders: A set of flexible plastic applicators.
Degreaser/Wax & Grease Remover: An automotive-specific solvent is crucial for cleaning panels before sanding and painting.
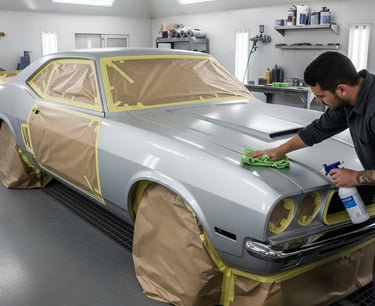
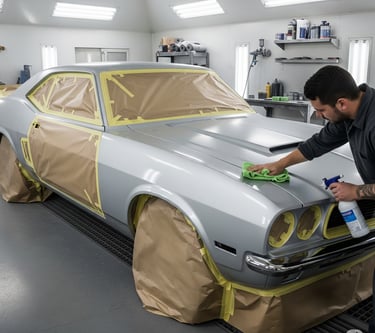
Masking Supplies:
Automotive Masking Tape: Use high-quality 3M or equivalent tape. Standard blue painter's tape will not hold up. Acquire various widths (3/4" and 1.5").
Masking Paper/Plastic: To cover windows, wheels, and any other areas you wish to protect from paint.
Tack Cloths: Special sticky cloths for removing the last traces of dust immediately before spraying.
Lint-Free Wipes/Microfiber Towels: For applying degreaser.
Category 3: The Spraying Equipment
This constitutes the core of your operation. Your air supply is as critical as your spray gun.
Air Compressor: This represents your most significant investment. It must deliver sufficient air volume (CFM) to power your tools.
Minimum: A 20-30 gallon tank, capable of providing at least 5−6 CFM @ 90 PSI.
Recommended: A 60-gallon, two-stage compressor that supplies 10−15+ CFM @ 90 PSI. A small compressor will necessitate pauses while it catches up, disrupting your workflow and finish quality.
Spray Gun(s): HVLP (High Volume, Low Pressure) guns are the preferred choice due to their efficiency and reduced overspray.
Kits are beneficial as they often include multiple needle/nozzle sizes.
Tip Sizes: Different materials require different tip sizes:
1.7−2.0 mm: For thick high-build primers.
1.3−1.4 mm: The ideal setup for base coats and clear coats.
1.0−1.2 mm: For touch-ups or thinner materials (not essential for a complete respray).
Air Hose: A minimum 3/8" diameter hose is essential to prevent pressure drops over its length. Get at least 25 feet.
Air Filtration and Regulation: CRITICAL for a clean, dry air supply. Moisture and oil from the compressor will ruin your paint job (leading to "fisheyes").
Regulator with Water Separator: Mounts at the compressor to set the main pressure and capture bulk water/oil.
In-line Desiccant Dryer/Filter: A disposable filter that attaches directly to the base of the spray gun. This is your final defense against moisture.
Gun Cleaning Kit: A set of brushes, picks, and solvent-resistant bottles. Clean your gun immediately and thoroughly after each use.
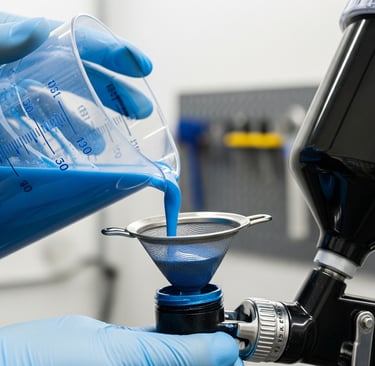
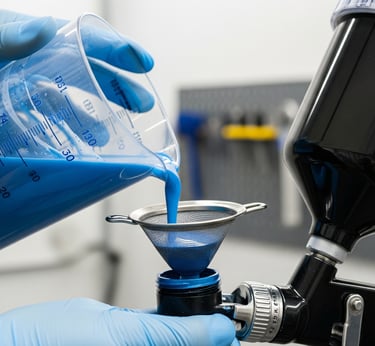
Paint Mixing Supplies:
Calibrated Mixing Cups: Featuring printed ratios on the side. Essential for precise mixing of paint, reducer, and activator.
Paint Strainers: To filter the paint as you pour it into the gun cup.
Paint Stirring Sticks. To stir the paint in a mixing cup.
Category 4: Finishing Touches
The paint is applied, but your work isn't finished. This is how you achieve that deep, wet appearance.
P1500 grit: To begin reducing orange peel or minor imperfections.
P2000−P2500 grit: To refine the scratches created by the P1500 grit.
P3000 grit: (Optional, but recommended) For a final sanding step that significantly simplifies the buffing process.
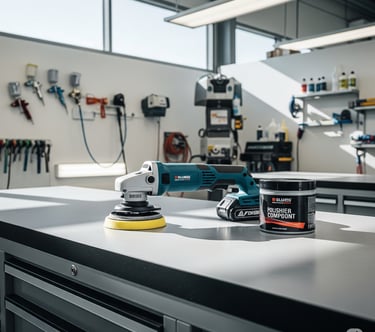
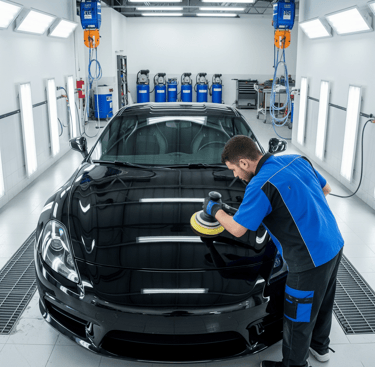
Dual-Action (DA) Polisher: Highly recommended for beginners. It is much safer and less likely to burn through the paint.
Rotary Polisher: More powerful and faster, but generates more heat and can easily burn through your clear coat if you lack experience.
Compounds & Polishes: You will need a cutting compound to eliminate sanding scratches and a finer polish to enhance the gloss.
Foam/Wool Pads: Corresponding pads for your polisher (cutting, polishing, and finishing).
There you have it. It appears to be a lot, and indeed it is. My best advice is to acquire the best safety gear you can afford and practice on an old fender or hood from a wrecker before attempting to paint your car.
Is painting a car myself actually hard? What's the biggest challenge?
Yes, painting a car yourself is very hard, and it’s super important to be honest with yourself about the challenge.
The biggest secret that the pros know is that a great paint job is 90% preparation and only 10% painting.
You will spend most of your time on the boring, difficult stuff: sanding.
You have to sand the entire car perfectly smooth and use the a right sand paper grits.
If you miss a spot or don't sand it evenly, it will stick out like a sore thumb under the new paint.
You also have to fix every single dent and fill every scratch. Then there's the environment ( dust,air moisture, insects) .
You need a super clean, dust-free place to paint, like a sealed garage. A single speck of dust or a tiny insect can ruin your finish.
Finally, actually spraying the paint evenly without causing drips (runs) or "orange peel" (a bumpy texture) takes a lot of practice.
You also have to consider the paint mixing ratios, the standard air pressure, distance of the spray gun from the surface to be painted, speed and the overlapping of paint.
It's a huge project, but if you have tons of patience and love a challenge, it can be incredibly rewarding.
Professional vs. DIY... How do I actually choose?
This is the million-dollar question! Choosing between a pro and DIY comes down to three things: your budget, your car, and your time/skill.
If you have a valuable car, a classic, or your daily driver that you rely on, it's almost always better to go to a professional.
The risk of messing it up is too high, and a bad paint job can actually lower your car's value.
A pro will give you a durable, beautiful finish and often a warranty.
However, if you have an old project car, a farm ute (pickup truck), or you're just looking for a fun, hands-on project and you're not worried about perfection, DIY is a great option!
It’s a chance to learn a new skill and save a lot of money. Just be realistic: your first attempt probably won't look like a professional job.
Think about what's most important to you: a perfect finish or the satisfaction (and savings) of doing it yourself.
Does a new paint job really increase my car's value?
Yes, it absolutely can, but there's a catch. A high-quality, professional paint job in a popular color (like black, white, silver, or a factory-original color) can significantly boost your car's resale value.
A study by PPG Industries, a major paint manufacturer, suggested that a good paint finish can account for a large part of a vehicle's perceived value.
Think about it: when you're shopping for a used car, you're immediately drawn to the shiny one that looks well-cared-for.
It can make the car sell faster and for a higher price. The catch?
A cheap, poorly done paint job, or a paint job in a weird colour (like neon pink or a faded yellow), can decrease the car's value.
Buyers will see it as a flaw they need to fix, so they'll offer you less money.
So, if you're painting your car to sell it, a good professional job is an investment that can pay off.
Are there any hidden costs I should know about?
Great question! Yes, there can definitely be some surprise costs, especially with professional jobs.
The initial quote a shop gives you is often just for the paintwork itself.
If they start sanding and discover a bunch of rust that was hidden under the old paint, fixing that will cost extra.
The same goes for deep dents or body damage.
Repairing body panels (panel beating) is a separate skill and will be added to your bill.
Another potential cost is for replacing things like old rubber seals around your windows and doors, or cracked, faded plastic trim.
To get the best result, it's a good idea to replace these at the same time, but that's an extra cost for parts and labor.
Always ask the shop what their quote includes and what potential extra charges might pop up once they start working on the car.
A good shop will be upfront about this.
How long will my car be in the shop for a professional paint job?
You'll need to be prepared to be without your car for a little while. The time it takes depends entirely on the level of paint job you've chosen.
A quick, basic "scuff and shoot" job might only take two to three days. They sand it down, mask it off, spray it, and let it bake to cure quickly.
For a standard quality job, you should expect your car to be in the shop for one to two weeks.
There's much more time spent on that all-important prep work sanding, filling, and priming before they even think about spraying the color.
If you've opted for that top tier, showroom quality job, be patient.
This meticulous process, with disassembly and reassembly, can take anywhere from a month to several months to complete.
Always confirm the estimated timeline with your painter before you hand over the keys.
Car wraps are a super popular alternative to paint, and it’s a great question to ask!
A vinyl wrap is like a giant, high-quality sticker that is expertly applied over your car's existing paint.
The cost is often similar to a standard-quality paint job, typically ranging from $3,000 to $6,000 AUD for a full car.
The big advantage of a wrap is options and protection. You can choose from hundreds of colors, textures (like matte, chrome, or carbon fiber), and even printed graphics that would be impossible or crazy expensive with paint.
A wrap also protects your original paint underneath. When you're tired of the color or want to sell the car, you can have the wrap removed, and your original paint will be perfectly preserved.
However, a wrap doesn't last as long as a good paint job, usually around 5-7 years, and it won't fix underlying issues like rust, dents or peeling paint.
If your car's surface is already in bad shape, you'll need to fix that before wrapping, or it will show through.
Ready for a Fresh Look? Time to Take Action!
Wow, that was a lot to take in! But now you're an expert on the cost of giving your car a new look.
You know the difference between a quick refresh and a full-on restoration, and you have a solid idea of whether to hire a pro or tackle the job yourself.
Feeling inspired? Here's your mission:
If you're leaning towards a professional job: Start researching top-rated auto body shops in your area.
Get at least three different quotes to compare prices, accept insurance claims and see who gives you the best vibe.
Don't be afraid to ask lots of questions!
If you're ready for a DIY adventure: Start making a list of all the supplies and tools you'll need.
Watch tons of tutorial videos online—knowledge is power!
Start with a small project, like painting a single panel or a test piece (a flat cardboard or thin metal sheet), before you commit to the whole car.
A new paint job is one of the most exciting upgrades you can give your car. It's a way to express your personality and fall in love with your ride all over again.
Have you ever painted a car?
What was your experience?
Or what dream colour would you paint your car if money was no object?
Let's talk all things cars!
You can give us a follow on our Social Media Channels.
We want to hear from you!
Sign Up To Our E-mail List to Get Pro Tip and Exclusive Content.
"Full disclosure: This post contains affiliate links! When you click on these links and make a purchase, I might earn a small commission. This is how I'm able to continue bringing you valuable content and recommendations, and it never adds to your cost. Your support truly helps keep this blog going!"


Precision
Expert automotive detailing and paint correction services.
Contact us.
Get pro tips and exclusive content
© 2025. All rights reserved. | vehikoloworkx.com